Foreign visitors to England would often remark how well dressed the English* women were, one traveller has been quoted to say that English women would wear velvet on her back when she had not a crust of bread in her house. It shows that England did not have the ragged poor of Europe. Britain had not had a peasant class since mediaeval times and this was reflected in the appearance of its people.
*There may have been minor regional differences, for the purposes of re-enactment a broad-based English style is appropriate.
 It was easy to tell the status of a person by the clothes they wore. The richer you were; the better fitted, brighter coloured and more decorative were the clothes you and your family wore. This extended to any servants you had. Clothes were part of servants pay, a well favoured servant could also expect to receive presents of cast off clothes from master or mistress, to be worn or sold on. The second hand market for clothing dressed the poorer in society and helped to finance the fashions of the aspiring rich.
Clothes were looked after, they were kept as clean as possible and were maintained in a good state of repair. The proverb ‘a stitch in time saves nine’ came from the days when if a repair was not rapidly done, further damage would be caused. Clothes were patched and darned until repair was no longer possible, when the item might be taken apart to be made into something else, for example, used to line quilts.
When researching early costume, the clothing of the poor is more difficult to trace. There are no surviving garments and few artists bothered to record what the poor wore – they could not afford to pay for portraits. However there are various ways to find out what was worn by the ‘common folk’.
The word contemporary is very important here, anything written or recorded by artists at the time is far more relevant to anything written or recorded after that period. Therefore to find out who in history to trust you have to do research, discover contemporary artists and writers. The Civil War period has been of interest over the centuries, which is why, for example, the Victorians painted many Civil War scenes, however these are not contemporary and should not be trusted for any costume information.
 Although British artists based in Britain, provide excellent reference material, there were not many of them. European artists can be used for research. However social conditions were different and this is reflected in the national costume. Countries close to Britain would have shared similar fashions. French fashions influenced the British Court. The English middle classes had strong trading links with Holland. The Dutch were mainly Protestant with a powerful merchant class, their clothes appear to be similar to that worn by British people of similar status. The wealthy spent some of that wealth on ornamenting their houses with portraits of themselves, their families and more importantly, for this article, their servants. The servants were probably in their best clothes, as were the bourgeoisie but the differences in the clothes gives an indication of how they were worn. Which is why Dutch Old Masters can be used as reference material.
When looking at any European artist you must ask yourself whether the paintings would have any relevance to British costume. Another important factor to consider is that the artist could lie, either to flatter or to make the picture look more aesthetically pleasing. The lines of stitching might not be painted in, colours may be brighter, the oils used in the painting may have deteriorated to produce colours not intended.
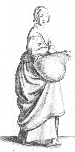
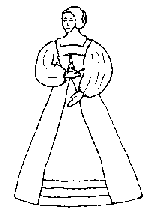
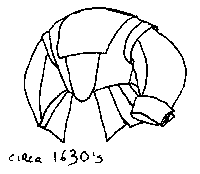
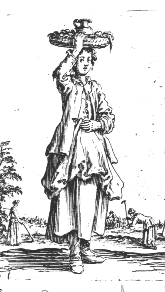
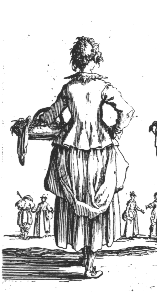
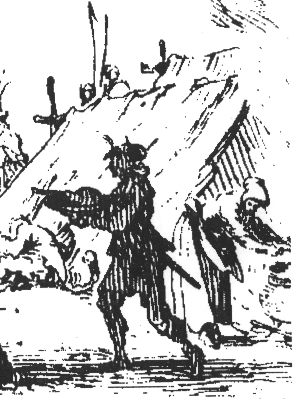
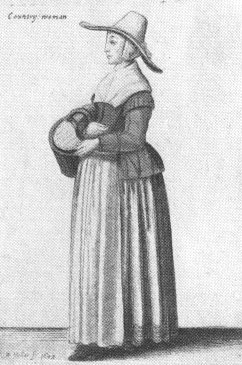
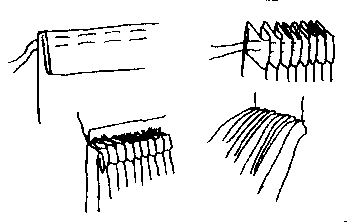
I refer to Wencellas Hollar, who spent many years in England and would draw working class people and also Jacques Callot, a Frenchman who recorded life and times of the 17th century including the 30 years war See illustrations. Illustrations 1 +2 by J.Callot, 3, a detail of ‘The Camp’ 1633-35 by J.Callot, a campfollower cooking on an open fire. Illustration 4, English Country woman by W.Hollar.
 Contemporary written evidence is useful, commentaries of important events often recorded the clothes worn, Samuel’s Peyps would describe in detail clothing worn by himself and those around him, in his diaries, sadly written after the Civil War period and therefore not contemporary . Wills written at this time record clothing, because it was a valuable asset. Finding contemporary writing is not always easy, neither is reading the writing. Translations and interpretations by modern authors can be useful, especially by fellow enthusiasts, published and found on traders row – caveat emptor.
There are some surviving garments from the 17th century, these tend to have a well known provenance. They would have been expensive or valuable for sentimental reasons, think of clothes saved nowadays – wedding dresses or christening gowns, worn once but kept indefinitely. Original garments give construction details. Working class clothes would have been made in similar manner of cut, the tailors would have used less expensive fabric.
A word of warning, due to the interest in the Civil War, these clothes may have been adapted for ‘fancy dress’ at any time after the Civil War or used by artists’ models.
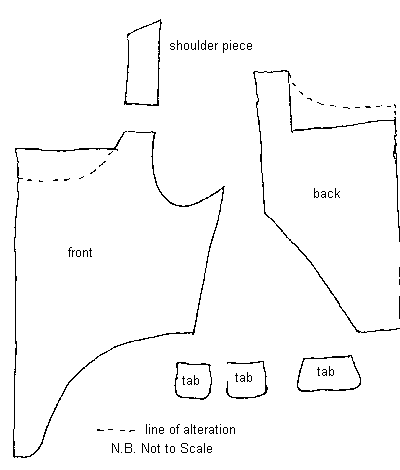
If you can get close enough, look carefully at lines of stitching, have they been altered for any reason? The alterations may have been made in the 17th century so that the garment could have been worn by someone else, or at a later date to accommodate a different style of corset.
For those who do not have the time or inclination to do research here is my interpretation of the clothes worn by working class English women.
Fabrics Linen was worn next to the skin, shifts, shirts , collars, coifs, kerchiefs were made of linen. Working class women would probably not have had the resources to keep their linen white, therefore use cream, grey or beige linen – or cotton dyed with tea or coffee grounds make a good substitute. (As a Textile graduate I know how to tell the difference but for the purposes of re-enactment cotton is acceptable). Wool and wool mixtures would have been used for skirts, stays, bodices. Lace was expensive, made by the poor, worn by the rich, when portraying working class people avoid lace.
Colours Only natural dyes were available, these could produce a wide range of strong colours, but the working class would have been limited by budget. There is an interesting article ‘Dyeing for the Army’ by John Bridges, Vol. 29 No. 4, O.O.D. The dyes would fade more easily than chemical dyes. Washed out muted colours look better than harsh, strong bright colours. Working out of doors and sleeping rough, following the army would speed up the wear on materials and colour.
Headgear Women covered their heads unless they were rich enough to have their hair dressed in the fashionable style. When rich women did not have the time to dress their hair they also wore coifs. Covering ones head was a social convention, even as recently as the 1950’s women would normally wear a hat or a headscarf to go out. Going bareheaded does not indicate a whore, for information about 17th century prostitutes read Geraldine Murgatroyd’s excellent article in vol. 26, No. 3, O.O.D. If you are trying to look richer or more desirable then you would attempt to wear your hair like a rich women – no hat and no hairstyle is pure laziness.
Before my Scottish friends start their letters there is one very well known regional difference. Scottish women tended to go bareheaded, or with hair adorned by red ribbons, until they got married. Then they would wear a coif.
Bonnets/coifs/scarves were worn, anyone with living history experience will know that covered hair is much more practical. If worn, all hair would be covered by the coif, hair trailing seductively should be left to the beer tent away from the public.
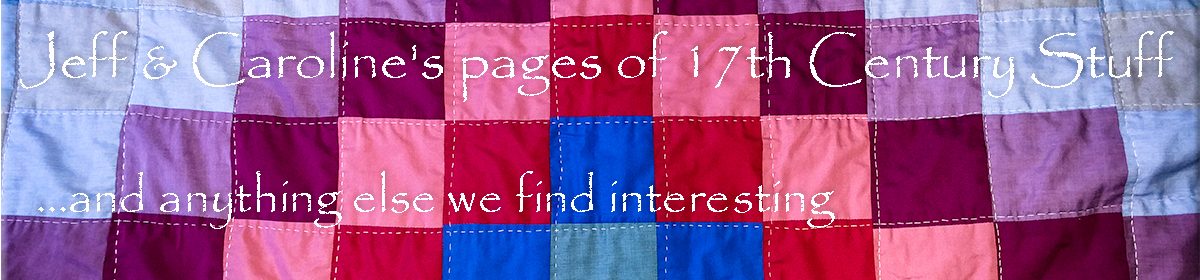
Shifts Were made of linen, they could be ankle or knee length. The sleeves would cover the elbow, most sleeves would reach the wrist. Most people would own two shifts or shirts, one to wear and one to wash.
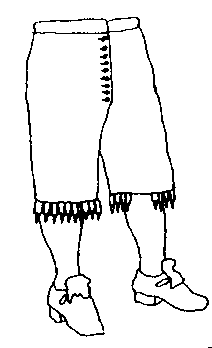
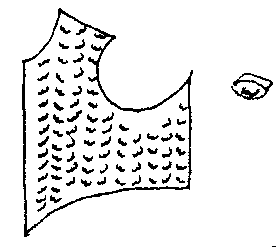
Stays Correct underwear makes the rest of the costume look ‘right’. For further information see the article is elsewhere on my web site. Boned sleeveless bodices would have been worn – although whalebone might not have been used, working class women could have used bents. These were bundles of reeds which acted as whalebone. Wooden busks would also have been used for shaping, these would have been carved locally. Numerous tapestries show women working in fields wearing sleeveless stay-like bodices. Take care, the tapestries were made in Europe and may not show British fashion, however, field working can get hot therefore it is likely that women wore only sleeveless bodices when working.
 Collars/Kercheifs A large square of linen, folded diagonally and pinned or tied about the neck was worn, especially by labouring women. By covering the back of the neck heat is kept in when cold and sunstroke avoided when warm. The kerchief also covers the décolletage modestly, 17th century women did not invite lewd behaviour. Wait until the beer tent to show off your cleavage and avoid the infamous ‘SK tan’ markings.
Bodices See contemporary references, they were unlikely to have had braid or ribbon unless second hand from richer women. Bodices could be boned and/or worn over stays.
Skirts These were full and would make the hips look large, wearing a bum roll does look ‘right’. Showing the ankle was not immodest in the 17th century (remember we are not Victorians). I advise ankle length skirts, this avoids the effects of capillary action I observed at Aylesbury – i.e. when the skirts drag on wet ground the hem gets sodden and capillary action draws the dampness higher and higher. All skirts were known as petticoats at this time, several petticoats were worn together.
I hope this provides a useful guide to what working class women probably wore in the 17th century.
Bibliography
Handbook of English Costume in the 17th Century
By C.W. Cunnington and P. Cunnington
A Visual History of Costume in the 17th Century
By Valerie Cumming
The Cut of Women’s Clothes 1600 – 1930
By Norah Waugh
Corsets and Crinoline
By Norah Waugh
Patterns of Fashion, The Cut and Construction of Clothes for Men and Women c. 1560 – 1620
By Janet Arnold
Evolution of Fashion Pattern Cut from 1066 – 1930
by M. Hill & P Bucknell
Costume History 1500-1900
By Valerie Cumming
Dress and Morality
By Aileen Ribeiro
English Costume
By Dion Clatton Calthrop
History of Costume
By Blanche Payne
Scenes of Everyday Life: Dutch Genre Paintings of the 17th century
By C Brown
Some Museums to visit:-
Victoria and Albert, London
Museum of London
Museum of Costume, Bath
Museum of Costume, Nottingham
Rachel Kay-Shuttleworth collection of Textiles Gawthorpe Hall, Padiham near Burnley.
Gallery of English Costume, Manchester
Museum and Art Gallery, Northampton (Footwear only)

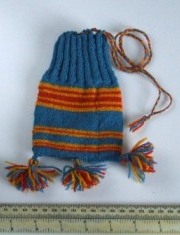
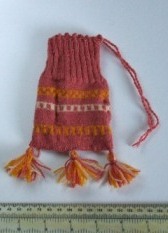
 The construction was of rib and stockinet although the top of the purse was unusual in that I had to cast on 6 stitches then make a chain of 7 stitches with a crochet hook, this is repeated 14 times. The crochet was a little fiddly but after the cast on row the knitting was straight forward. Richard Rutt gives the rib to be 2 knit and 2 purl for 5 centimetres; the Scottish Antiquaries gives 2 knit and 3 purl for 5 centimetres